I am not sure (yet) how I would use this idea but it is absolutely intriguing. The use of toys for instruction can be as low tech or high tech as you want.
Using tools for story telling It is not a totally new idea but one worth exploring.
Further perspectives can be found in Jennifer Valley's Elearning Toybox post,
Inspiration can be found in the results of an elearning challenge
What's hiding in your toyroom?
Showing posts with label images. Show all posts
Showing posts with label images. Show all posts
Monday, October 26, 2015
Wednesday, March 4, 2015
Using fun and Colorful Background Images with Text
I can be a lot of fun to bring in colorful images to your online courses to enhance learning, or perhaps you wish to make an interesting a fun PowerPoint Presentation using fun and colorful images. We all know how challenging it can to add text to these images so that the text is readable and it doesn't detract from the image.
I recently helped my co-worker's middle school daughter with a PowerPoint Presentation she was putting together for a class project. She had some fun images she wanted to use, but the text just wasn't readable. I tried to offer some good pointers, but I didn't feel I really succeeded in helping her out much. I wish I had read this great article below before I had the opportunity to help her.
7 Ways to Overlay Text on Photos -

 I just used PowerPoint to insert an image and changed the color a bit using the Format Picture tool and changing the saturation a bit:

I then added a shape. Using the Format Shape tool, I added the gradient effects by selecting Fill. You can add gradient stops, choose various colors and set the transparency level to what suits your picture.

I recently helped my co-worker's middle school daughter with a PowerPoint Presentation she was putting together for a class project. She had some fun images she wanted to use, but the text just wasn't readable. I tried to offer some good pointers, but I didn't feel I really succeeded in helping her out much. I wish I had read this great article below before I had the opportunity to help her.
7 Ways to Overlay Text on Photos -
by Nicole Legault from E-Learning Heroes
A brief summary follows, but be sure to click on the link above to get the full article complete with pictures!
- Choose Contrasting Colors
- Use Empty Spaces for Text
- Lighten Your Image
- Darken Your Image
- Use a Gradient Overlay
- Insert a Shape
- Add a Text Drop Shadow
The article offers a video tutorial on how to work with images in a video software that you may not have called "Articulate Storyline"; however, you don't need this software to create cool images with text overlay. You can create these same effects by adding images to a PowerPoint Slide. If you just wish to capture a picture of what you created and save it to upload into your course, use the Snipping Tool! (The Snipping Tool is free on any PC. Just click the Start button and search for the tool by typing in "Snipping".)
Here is an example of using the tools already provided in PowerPoint (like adding and then formatting shapes) and then capturing the image using the Snipping Tool:
I then added a shape. Using the Format Shape tool, I added the gradient effects by selecting Fill. You can add gradient stops, choose various colors and set the transparency level to what suits your picture.
Have fun and experiment a bit. You will be able to get the right effect for your purposes and not have to spend any money on fancy software!
Wednesday, June 11, 2014
Free use of Art/Artifact Images
Would you like to use images with the assurance that you have the rights to use them? Take a look at Museum of New Zealand website. They over over 30,000 images of art and artifacts that you can download and re-use for free.
When you can search for an image, I would suggest making sure you click the option to search for only downloadable images. This will save you from scrolling through a lot of "Image not available" pages!

Once you find the image you want to use and click on it, you will see information about the image such as medium, materials, classification, etc. You can find out more about how an image is licensed by clicking on the download button.....

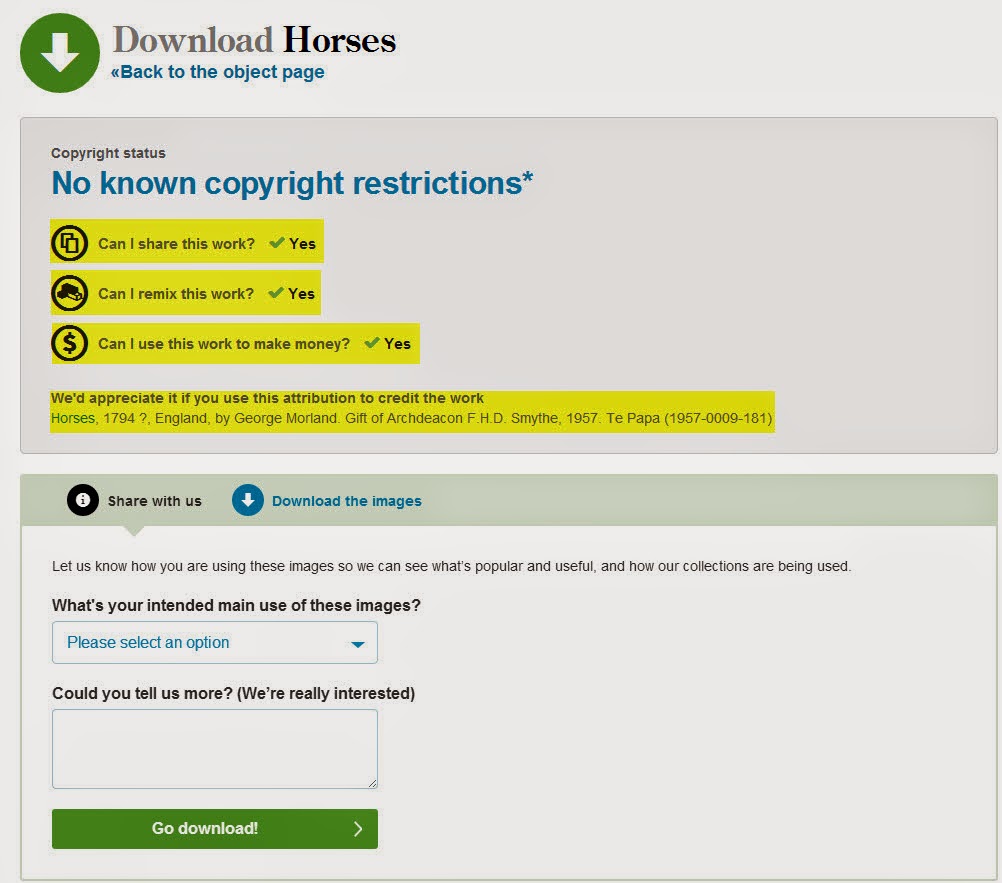
When you can search for an image, I would suggest making sure you click the option to search for only downloadable images. This will save you from scrolling through a lot of "Image not available" pages!
Once you find the image you want to use and click on it, you will see information about the image such as medium, materials, classification, etc. You can find out more about how an image is licensed by clicking on the download button.....
......which will take you to the next page where you can review the copyright information and attribution information.
You now have an image you can insert into a powerpoint or even a page in Canvas. The website is collections.tepapa.govt.nz. Check it out by clicking on this link to go directly to the website: Museum of New Zealand Online Collections.
Subscribe to:
Comments (Atom)